The Guarani Indians of Paraguay and Brazil had been sweetening their bitter beverages with kaa he-he (meaning sweet herb) for centuries before Italian botanist Moises Santiago Bertoni “discovered” the herb in 1887 and recognized it as a previously “unknown” variety of stevia. He named it Stevia rebaudiana in honor of the Paraguayan chemist named Rebaudi, who first extracted the component stevioside, the sweet molecule in the plant’s leaves.
A member of the Asteraceae family, which includes sunflowers and chrysanthemums, the genus Stevia includes nearly 300 species. Of these, only S. rebaudiana is noted for its sweetening power. And sweet it is. Fresh stevia leaves generally have a slight licorice flavor and are many times sweeter than sugar. When dried, stevia leaves are sweeter still. Stevia extract is as much as 300 times sweeter than sugar.
Natural and calorie-free, stevia does not appear to increase blood glucose levels, making it a plus not only for dieters, but also for diabetics. The herb is not, however, without controversy. Although widely consumed in its natural state or as an addition to commercially prepared foods and beverages throughout much of the world (including South America, Japan and other Asian countries), stevia is banned as a food additive in Canada, the European Union and the United States, where the Food and Drug Administration believes the herb has not been thoroughly tested. Because of a wrinkle in regulatory power, though, it may be sold in the United States as a dietary supplement.
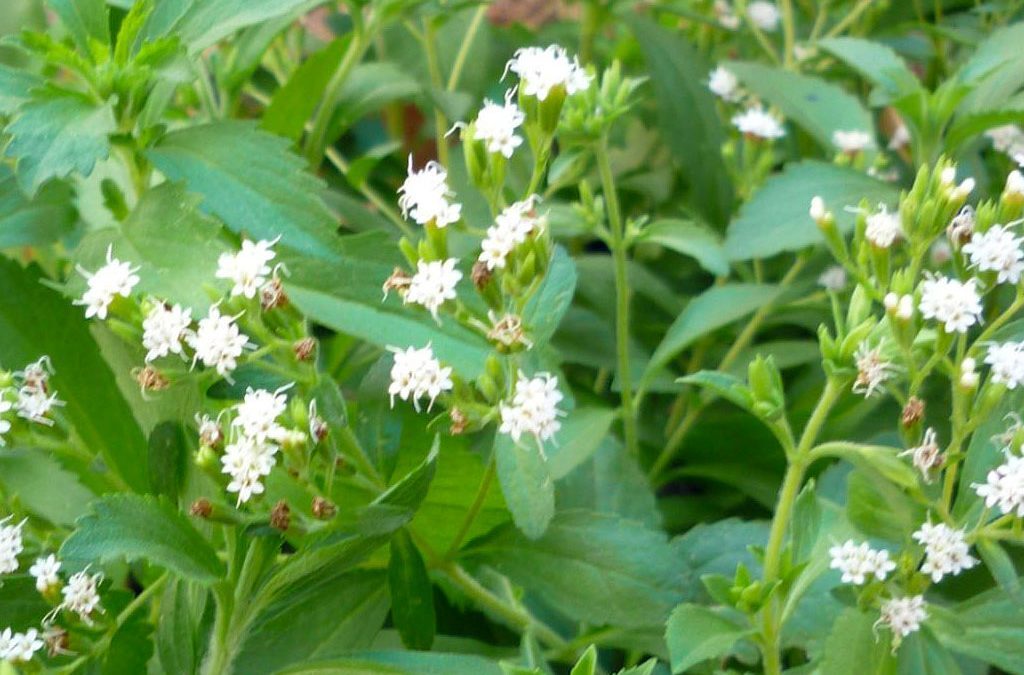
It’s easy to grow your own stevia for personal use. In the garden, stevia grows 18 to 30 inches tall with gray-green oval leaves and, periodically, small white flowers. Although many references rate stevia as hardy only to Zone 11, some Zone 9 and 10 gardeners report the plant has survived winters there. Some gardeners in Zone 8 report stevia dies back to the ground in winter, but will grow back in spring. In Zones 7 and colder, you will need to grow stevia as a garden annual or in a pot, which you could move indoors for winter. Set plants outdoors after all danger of frost has passed. Stevia prefers plenty of sunshine and a sandy or loamy soil kept moist, not wet, with mulch or compost. Avoid overwatering potted plants.
Stevia has numerous uses in the kitchen for the creative cook. But remember that it does not have the same properties as sugar. While it can be used to sweeten dairy products, puddings, sauces, salads and custards, it is not a suitable replacement for sugar in baked goods. For a refreshing beverage, try adding a fresh stevia leaf along with a mint leaf to iced tea.
You need not be a South American planter to be a successful stevia grower. While the herb’s native locale may make it appear somewhat exotic, it has proved to be quite adaptable and capable of being cultivated in climate zones as diverse as Florida and southern Canada.
True, home-grown stevia may lack the potency of refined white stevia extract; whole stevioside content generally ranges from 81 to 91 percent, as compared to a leaf level of approximately 12 percent. But it can provide you with a quantity of freshly harvested stevia ‘tea leaves’ to augment your supply of commercial stevia sweeteners.
Organic gardeners in particular should find stevia an ideal addition to their yield. Though nontoxic, stevia plants have been found to have insect-repelling tendencies. Their very sweetness, in fact, may be a kind of natural defense mechanism against aphids and other bugs that find it not to their taste. Perhaps that’s why crop-devouring grasshoppers have been reported to bypass stevia under cultivation.
Gathering Autumn Stevia Leaves
Harvesting should be done as late as possible, since cool autumn temperatures and shorter days tend to intensify the sweetness of the plants as they evolve into a reproductive state. While exposure to frost is still to be avoided, covering the plants during an early frost can give you the benefit of another few weeks’ growth and more sweetness.
When the time does come to harvest your stevia, the easiest technique is to cut the branches off with pruning shears before stripping the leaves. As an extra bonus, you might also want to clip off the very tips of the stems and add them to your harvest, as they are apt to contain as much stevioside as do the leaves.
If you live in a relatively frost-free climate, your plants may well be able to survive the winter outside, provided you do not cut the branches too short (leaving about 4 inches of stem at the base during pruning). In that case, your most successful harvest will probably come in the second year. Three-year-old plants will not be as productive and, ideally, should be replaced with new cuttings.
In harsher climates, however, it might be a good idea to take cuttings that will form the basis for the next year’s crop. Cuttings need to be rooted before planting, using either commercial rooting hormones or a natural base made from willow tree tips, pulverized onto a slurry in your blender. After dipping the cuttings in such a preparation, they should be planted in a rooting medium for two to three weeks, giving the new root system a chance to form. They should then be potted — preferably in 4.5-inch pots — and placed in the sunniest and least drafty part of your home until the following spring.
Unlocking the Sweetness
Once all your leaves have been harvested you will need to dry them. This can be accomplished on a screen or net. (For a larger application, an alfalfa or grain drier can be used, but about the only way an average gardener might gain access to such a device is to borrow it from a friendly neighborhood farmer). The drying process is not one that requires excessive heat; more important is good air circulation. On a moderately warm fall day, your stevia crop can be quick dried in the full sun in about 12 hours. (Drying times longer than that will lower the stevioside content of the final product.) A home dehydrator can also be used, although sun drying is the preferred method.
Crushing the dried leaves is the final step in releasing stevia’s sweetening power. This can be done either by hand or, for greater effect, in a coffee grinder or in a special blender for herbs. You can also make your own liquid stevia extract by adding a cup of warm water to 1/4 cup of fresh, finely-crushed stevia leaves. This mixture should set for 24 hours and then be refrigerated.
Growing Stevia without Land
Just because you live within the confines of an apartment or condominium doesn’t mean you can’t enjoy the benefits of growing stevia. This versatile plant can be grown either in pots on your balcony or any sunny spot, or else in a hydroponic unit. Stevia plants also do quite well in EzGro gardens. A properly fertilized hydroponic unit or container garden can provide you with as much stevia as an outdoor garden, if not more.