


Hi, I’m Hope, the EzGro Garden Girl, and welcome to my blog! In the pages to come I’ll be chronicling my experiences growing the EzGro way, and also providing plenty of growing tips, recipes, and DIY projects to help you fully use and enjoy your bountiful harvests!
My introduction to EzGro Gardens occurred in the form of the Patio Garden. There are so many types of plants that thrive in the EzGro system that I spent a good deal of time debating over which 20 plants I should grow in my Patio Garden. Since I’ve always pined for and never possessed a well-stocked kitchen herb garden, I decided to fulfill my wish and finally have all those fresh herbs constantly on hand.
I had a few sites around my home that I considered for the garden, but most of them were too sunny, too shady, or just in less than attractive places, so I settled on a little grove area in front of the house where the plants would get plenty of sunlight but still have some tree-shade to protect them through our hot, harsh Texas summers. My Patio Garden is now convenient to the electrical outlet, and also to the kitchen and outdoor dining table for easy access to the fresh herbs. I’ve noticed since I set up the garden that I’m using far more herbs in my cooking and beverages than I ever did when I had to walk all the way to the garden to pick them (out of sight, out of mind, in sight, in mouth, I guess!).
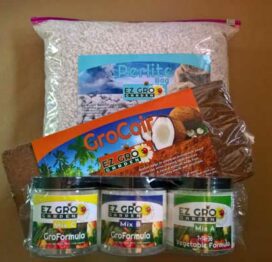
I had practiced setting up the Patio Garden while it was empty a few times so I had the basic placement of all the parts down, but when I set it up for actual use it took a little longer. After soaking the coconut coir I mixed the Gro Rock into it by hand, and it took me about a half hour to form a consistent mixture. I purchased herb transplants from a local nursery and had them ready to place in the system, but you can always grow from seed in the system as well.
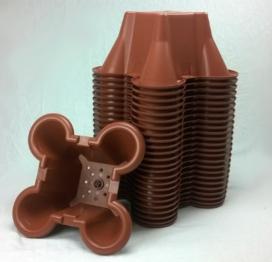
I set up the reservoir base on an attractive, rustic wooden stand, put the pump inside and threaded its cord through the hole in the reservoir lid, then placed the first pipe into the top of the pump. After replacing the lid over the pipe I began to stack and fill my Quad Pots. A few of the potted herbs I had bought had larger potting-soil bases than would easily fit into the pots, so I shook off much of the soil from the roots and squished them in, filling in the empty spots with Gro Mix. If you do choose to use transplants for your garden, you’ll have some Gro Mix left over, but don’t throw it away! Save it in a bucket or tub with a lid for future use.
When I finished stacking the pots and filling them with transplants and Gro Mix, I placed the diffuser cup on top and finished it off with the drip plug. It’s always a good idea to add the nutrient-enhanced water by pouring it into the diffuser cup and letting it drip down through your plants as it saves work for the pump and ensures that thirsty transplants get a good drink.
The first time I mixed the nutrient solution with water I was a little clumsy about it, but since then I’ve developed a convenient system that makes the process quick and hassle-free. I keep all of my nutrient mixes (A,B, and C bottles), along with a gallon jug, 3 nesting plastic cups, and the included measuring syringe, in a bag together. When the time comes to add nutrient water I bring it all out and line it up on the counter. I figure out how much water I need to add based on the current level of water in the reservoir, and measure the nutrients into the gallon jug for each gallon. I found it’s easier to pour some Mix A, Mix B and Mix C into the plastic cups so I can reach them well with the syringe. Once I’ve added the proper amount of nutrients to the gallon of water I pour it into the diffuser cup and repeat. The whole process takes minutes now, and I feel very scientific while I’m doing it.
After the first watering my Patio Garden was looking happy and healthy, but I had to leave the house in an hour. I figured that would be plenty of time to set the automatic watering timer, but on this point I was sorely mistaken. I read over the instructions included in the timer package twice before realizing that they still made no sense whatsoever to me. At that point I should have watched the online video that the instructions told me to watch, but it was late in the afternoon and my sun-addled brain was exhausted, so I just kept at it till I had to give up and leave. The next day, instead of watching the video, I sat in the yard and played around with the timer for at least 2 hours before I succeeded in setting it properly. I suppose I now have the satisfaction of knowing I figured it out on my own, but I wasted a lot of precious time to get it. Take my advice! Watch the video.
It’s been about three weeks since I set up my Patio Garden, and all my herbs are thriving and producing nicely. Since the first day I have moved a couple of plants out and replaced them with others that were more appropriate (my fennel got so tall it looked odd with its neighbors, and the gerber daisies I put in didn’t flower for long), but now I am perfectly pleased with the selection of herbs. I included Genovese compact basil, sweet basil, purple basil, purple ruffles basil, (can you tell I love pesto?), lemon basil, mother of thyme, marjoram, peppermint, spearmint, Italian parsley, Greek oregano, sage, lavender, chives, lemon thyme and a few flowers for accent. It has been so fun to have fresh herbs on hand for all of my favorite recipes and I’ve found myself searching out new recipes specifically to highlight particular herbs! Keep your eye out for recipes in my Garden Fresh Recipe Box, I will be updating it frequently with fun recipes to help you take advantage of all your garden’s bounty! And I’ll make you a solemn promise right now- when you look in the Recipe Box, all you will find is recipes. I won’t regale you with a 5 page manifesto of how I found the recipe, who in my circle likes the recipe, or the history of the recipe, because when I am searching out new foods to make that is my biggest pet peeve- I just want to get cooking!
So welcome again to my blog, and stay tuned for growing tips, garden advice, cooking tips and recipes!
Warm wishes for a happy growing season,
EzGro Garden Girl
Trackbacks and pingbacks
No trackback or pingback available for this article.
Featured
-
 Rainwater Pressure Tank SystemRegular Price $449.00
 -
 Five Tower Deck GardenRegular Price $2,499.00
 -
 EzGro Precision Micro TrimmerRegular Price $11.99
 -
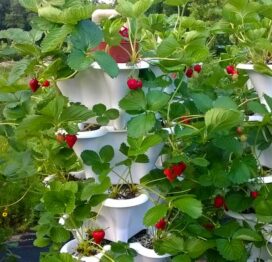 Five Tower Strawberry GardenRegular Price $2,799.00
 -
 Cold Pressed Neem OilRegular Price $29.92 – $38.71
 -
 Chemilizer InjectorRegular Price $349.99
 -
 EzGro Quad Pot 50 PackRegular Price $499.90
 -
 EzGro Patio GardenRegular Price $389.99 – $399.99
 -
 Patio Garden Recharge KitRegular Price $49.00
 -
 EzGro Quad Pot 25 PackRegular Price $274.99


Leave a reply